Fault Line

- Puzzle
- Platform
 Keyboard
 Mouse
Mouse
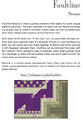
Fault Line is a puzzle-platform game released June 16, 2010[1]. It is considered by some to be one of Nitrome's most ingenious games[2]. The player controls a purple robot named Zapo who has to complete levels using his ability of merging and unmerging walls with the two nodes on his hands. This game, along with twelve other games, was made a distributable game on August 25th, 2011, and was one of the first distributable games.
Controls[edit | edit source]
![]()
![]() Left and right arrow keys - Move
Left and right arrow keys - Move
![]() Up arrow key - Jump
Up arrow key - Jump
![]() Mouse - Click and drag nodes to fold them together
Mouse - Click and drag nodes to fold them together
Levels[edit | edit source]
Level 1[edit | edit source]
Run forward until a wall is encountered. Join the nodes, run past the fault line, and join the new pair of nodes next to the player. Jump up and disjoin the node. Run forward to find the teleporter.
| Video |
|---|
| Provided ID could not be validated. |
Level 2[edit | edit source]
Go up the ramp. At the top, join the nodes and jump down. Disjoin the nodes to get to a new ramp. Climb this one, too. Join the nodes, jump down, disjoin the nodes and run up top, the player will appear in a new section.
In here, join the node on the left with the top node and jump on the ledge. Dis-join the nodes to get Zapo caught in a trapezium. Zapo can be freed by joining the node on the right with the top one. Now, jump onto the teleporter.
| Video |
|---|
| Provided ID could not be validated. |
Level 3[edit | edit source]
Jump off of the two platforms to the checkpoint. There, jump down where the platform is going. Join the nodes under the pillar to make a platform. Hop on the ledge to the left, then get on the giant platform. The teleporter is above the character.
| Video |
|---|
| Provided ID could not be validated. |
Level 4[edit | edit source]
Jump down in the first opening, and a node separator will be seen. When the character steps on them the nodes are disjoined. Join the nodes on the left wall. The laser should go away, so the character can go in there now. Don't step on the node separators. Jump over to the right and this time, step on the node separators. It gives you a ledge so you can climb up to the checkpoint. Once you're at the checkpoint, join the nodes on the ceiling.
Jump down on the super-small platform, and, while avoiding separators, jump down. The exit of this section is along the left wall. Down here you are blocked by a horizontal laser. Step on the separators, join the nodes, and the laser disappears. Activate the checkpoint.
Keep jumping over separators, all of them. And then you come to the last set of separators, and you can step on these. A ledge (and some lasers) appear, allowing you to jump up to the teleporter.
| Video |
|---|
| Provided ID could not be validated. |
Level 5[edit | edit source]
Ride on a platform across the mines, then jump down to the checkpoint. Join the nodes, then ride across these mines. You have to jump when you come to the fault line. Jump down to another checkpoint and join the nodes. When the platforms aren't there, jump across the fault line. The teleporter is on the other side.
| Video |
|---|
| Provided ID could not be validated. |
Level 6[edit | edit source]
This level is covered in mines, so you cannot jump. Get on the platform, get off at the square, and get on a new platform that takes you to the checkpoint. Get on a new platform and join the nodes. The platform blurs with another when it goes to the fault line. Get on the platform to the right of the line and ride it over to the teleporter.
| Video |
|---|
| Provided ID could not be validated. |
Level 7[edit | edit source]
Join the nodes and run left. Jump down to the checkpoint and separator; step on them both. Run left, join the nodes, and jump atop them. Avoid the laser. Disjoin them to deplete the laser, then jump down. Join the nodes and run to the teleporter.
| Video |
|---|
| Provided ID could not be validated. |
Level 8[edit | edit source]
Get on the left platform, join the top nodes, get off the platform. Disjoin the nodes after the purple blocks break. Join the bottom nodes, disjoin the nodes after the blocks break. Ride the platform to the teleporter.
| Video |
|---|
| Provided ID could not be validated. |
Level 9[edit | edit source]
Use the platforms to jump to the eastern ledge. Join the nodes and get on a new platform. Disjoin and jump to the checkpoint. Join the nodes above, get on the ledge, then get on the platform. At the end of the ride, jump over the mines to the teleporter.
| Video |
|---|
| Provided ID could not be validated. |
Level 10[edit | edit source]
There are four nodes in this level, number 1 to 4, left to right. So the node on the left is 1, right is 4, with 2 and 3 in between. So, join 1 and 2, disjoin them after you here a clank, do the same with 3 and 4. Join 2 and 3, jump down, and run right to find the teleporter.
| Video |
|---|
| Provided ID could not be validated. |
Level 11[edit | edit source]
Join the nodes left of Zapo, then jump over the ledge and disjoin the node. Join the nodes directly under the vertical lasers, then join the other two. Run over to the teleporter.
| Video |
|---|
| Provided ID could not be validated. |
Level 12[edit | edit source]
Jump down and join the nodes, run past the fault line, and disjoin. Climb up the 'stairs', and the join the highest node with the lowest one. Run past the line, jump down, and step on the checkpoint. Join the nodes farthest away from you; they are in a vertical line. Connect the leftover nodes and run left to the teleporter.
| Video |
|---|
| Provided ID could not be validated. |
Level 13[edit | edit source]
The nodes: 1 = top, 2 = middle-left, 3 = middle-right, 4 = middle, 5 =bottom-left, 6 = bottom-right. Just number the nodes left to right, top to bottom. So, Join 5 and 6, run past the fault line, disjoin them, then join 1 and 4. Jump up to the ledge, disjoin these ones, join 2 and 3, run past. Jump atop the block. You can go down after you join 2 and 5. Disjoin, join 5 and 6, and run over to the teleporter.
| Video |
|---|
| Provided ID could not be validated. |
Level 14[edit | edit source]
Blades! Blade 1 is a blade coming out of the bottom of the fault line and moving left. Run past it and jump to the highest ledge. Blade 2 is an L shape, you have to jump over them and onto the square. Blade 3 are a small blades going up and down each side of the fault line, jump over them when both are in the middle. Blade 4 is the same a 3, just it has ceiling right above it, so you run past instead of jumping.
After blade 4 there is a checkpoint, so if you die on 5 or 6 you're covered, but if you die on 1, 2, 3, or 4 you go all the way back to the beginning. Blade 5 is just like 1, except if comes out the top and goes right. Jump down as it passes. Blade 6 is pretty much like 2, just move through the sections. Run right to find the teleporter. Sorry about all the numbers in the last two levels, just it's easier than trying to locate them.
| Video |
|---|
| Provided ID could not be validated. |
Level 15[edit | edit source]
Jump on the first spinner and continue to use the nodes to progress. Avoid falling into the mines below the spinners. At the third spinner, fold the wall ahead diagonally to get through. After that, there's a checkpoint. After the checkpoint, there are two spinners with mines ahead. Use the nodes to make a way past the mines to get to the next two spinners, then unfold the nodes to open a way to the teleporter. On the last spinner, jump to the platform with the teleporter.
| Video |
|---|
| Provided ID could not be validated. |
Level 16[edit | edit source]
There are nodes to the right of Zapo in the beginning, also to the left. Join the ones on the right, then the left. Notice the you can not disjoin the ones on the right, that is why you join them first. Jump on the ledge on the left, Disjoin the nodes on the left, jump past the fault line.
Do nothing with the nodes left of you. There is a mine directly above the ledge to get to the teleporter. Don't stand so the wall is smack dab in front of you, stand on the top-left corner of the ledge. Jump, then swerve past the mine. If this doesn't work, just join the rightmost node in sight with the the on the corner joint, and/or leftmost. Use the same method to get to the ledge. Jump in the teleporter.
| Video |
|---|
| Provided ID could not be validated. |
Level 17[edit | edit source]
Incomplete section
This section is incomplete. You can help by adding the missing info.
Ride the platforms to the right without jumping, then jump down to the checkpoint. Ride left to the teleporter.
| Video |
|---|
| Provided ID could not be validated. |
Level 18[edit | edit source]
Join the two rightmost nodes, the one on the the wall and the one in the mines. Step on the separator and then the checkpoint. Join the high node on the ceiling to the left with the one left of the mines but right of the sphere shooters. Run past the fault line, disjoin the nodes and jump down to the teleporter.
| Video |
|---|
| Provided ID could not be validated. |
Level 19[edit | edit source]
Ride the platform right. Stand on the left side if it because of the mines. Join the nodes and get on the next platform. Disjoin the nodes, join the new ones you find, then jump up to the checkpoint and disjoin them. Get on the last platform, join the nodes on the ceiling, then jump over to the teleporter.
| Video |
|---|
| Provided ID could not be validated. |
Level 20[edit | edit source]
This level is full of platforms, avoid being squished. Squishier 1 goes through a horizontal fault, merely jump on it and go through. Squishier 2 goes back and forth, run through when it's not in your path. Squishier 3 is just like 1, except you're trying to go up, so jump to the ledge when it is further up than you. Activate the checkpoint, then on to squishier 4.
Go past easily, run right, jump atop it, and when squishier 5 isn't there so jump. Time your jump perfectly, off the end of 4 to go past and on top of 5. Run past when 6 isn't there, then stand on it as a boost up to the teleporter.
| Video |
|---|
| Provided ID could not be validated. |
Level 21[edit | edit source]
Keep joining the nodes up the checkpoint. Step on the checkpoint and separators, then jump on the ledge to the left. Join the nodes and, while avoiding the mine, jump up to the separators. Activate the checkpoint, then go beneath the platform and press on the pillar to the left.
Join the nodes and jump on the leftmost platform, then ride up and step on the separator. Jump to the top of the ledges on the right. Keep joining the nodes until you see a platform moving back and forth. Jump on the separator set to the right. This is the best part, jump down and enjoy your long ride down to the teleporter.
| Video |
|---|
| Provided ID could not be validated. |
Level 22[edit | edit source]
Go right to where the gap in the mines are, then join the nodes to go down to the checkpoint. Do the same method to get to the next checkpoint. Jump on the rectangle to the right, then join the nodes when the farthest platform down is directly under you. If all goes well, you should land on the platform, get pushed off by a wall, and end up by the teleporter.
| Video |
|---|
| Provided ID could not be validated. |
Level 23[edit | edit source]
Join the nodes, then jump over to the right of the laser but left of the wall. You should be right next to the laser. Disjoin the nodes, activate the checkpoint, the join the nodes again. Join the nodes in the lasers, then jump to the far ledge and disjoin them. Get on the tiny block that the laser is shooting at, then jump up to the checkpoint.
Here, you should go left and should see 90, no 90 degrees of this angle that the nodes make. Join the nodes in a horizontal. Jump over the mines, disjoin, jump back over the mines, then join the vertical nodes and jump down to the teleporter.
| Video |
|---|
| Provided ID could not be validated. |
Level 24[edit | edit source]
Incomplete section
This section is incomplete. You can help by adding the missing info.
Run right, avoiding the platforms then jump down to the checkpoint. Run left to the teleporter.
| Video |
|---|
| Provided ID could not be validated. |
Level 25[edit | edit source]
Join the two highest nodes that can be sees, and go to the room at the right. Disjoin the nodes and join the two nodes that are in the same wall. Jump to the cut platform and disjoin the nodes, then jump to the checkpoint located at Zapo's right/players left.
Go back and join the two highest nodes that can be sees now, then go to the room above and disjoin the nodes. Join the nodes at the roof and be harmed by mine to reach the last restart pad. Go down and proceed to the finish.
| Video |
|---|
| Provided ID could not be validated. |
Level 26[edit | edit source]
First join the two nodes near the laser pointing down, then disjoin them. Next join the 2 near the other laser, and jump up so you are right up against the wall, then de-join. next join the bottom node from step 1 to the top one from step 2, then join the two disjointed nodes and finish the level.
| Video |
|---|
| Provided ID could not be validated. |
Level 27[edit | edit source]
This section is empty. You can help The Nitrome Wiki by adding content.
| Video |
|---|
| Provided ID could not be validated. |
| Video |
|---|
| Provided ID could not be validated. |
Level 28[edit | edit source]
This section is empty. You can help The Nitrome Wiki by adding content.
| Video |
|---|
| Provided ID could not be validated. |
| Video |
|---|
| Provided ID could not be validated. |
| Video |
|---|
| Provided ID could not be validated. |
| Video |
|---|
| Provided ID could not be validated. |
Level 29[edit | edit source]
This section is empty. You can help The Nitrome Wiki by adding content.
| Video |
|---|
| Provided ID could not be validated. |
Level 30[edit | edit source]
This section is empty. You can help The Nitrome Wiki by adding content.
| Video |
|---|
| Provided ID could not be validated. |
| Video |
|---|
| Provided ID could not be validated. |
Ending[edit | edit source]
![]() This collapsible box contains a spoiler! Use [show] to reveal.
This collapsible box contains a spoiler! Use [show] to reveal.

The ending says: Test Sequence Complete. Zapo is in an arch-like structure, and to the left is a screen with a white battery. Beneath it says 75%. To the right of Zapo is another screen which says "upload", and several things appearing on the screen.

The ending image


A heart

A node from the game


A teacup

A Flipside cameo


Hazards[edit | edit source]
- Mines - They take up one square each. They are also stationary and scattered throughout the level. When Zapo touches them, he gets killed.
- Lasers - They emit a constant hot laser beam and kill Zapo on contact. They can be used to destroy liquid-holding blocks, though.
- Sphere shooting squares - Those blocks shoot a constant stream of spheres which kills Zapo on contact. They must be folded using nodes for getting past.
- Rotating spike platforms - These platforms have arms with spikes on them which kill Zapo on contact. Zapo must go underneath or over (depends on how it's put in) the arms to get across.
Interactive objects[edit | edit source]
- Holographic screens - They show the player the basics of the game, and are only seen in the first level.
- Restart pads - They serve as checkpoints. In the event that Zapo gets killed, he will return to the last pad visited rather than the beginning of the level.
- White nodes - Zapo can connect two nodes to merge and fold a section of the level. However, if Zapo also gets folded, the lines will automatically unfold. Some levels require folding the walls with nodes, while other levels the nodes have been automatically folded.
- Line deactivation switches - When the Zapo stands on a line deactivation switch, all the faults previously folded will become unfolded. They are never seen on levels in which the walls have been automatically folded.
- Moving platforms - They move back and forth to transport Zapo from one location to another. On some levels, Zapo must be careful not to get smashed between them or he will die.
- Rotating platforms - A platform with rotating arms, Zapo can use them to get from one area to another.
- Liquid holding blocks - These blocks sometimes block the way and can only be destroyed with a laser beam. When a laser intersects with container, the liquid inside will begin to boil. Eventually the block will burst.
- Teleporter pads - The starting and ending pads- when stepped on, it will finish the level.
Credits[edit | edit source]
| Artwork | |
|---|---|
| Programming | |
| Music |
Awards[edit | edit source]
| Site/Event | Year | Contest | Prize | Outcome |
|---|---|---|---|---|
| Jay is Games | 2011 | Best of Casual Gameplay 2010 | Best Platform game of 2010 (Browser games) | Won - first place |
Book appearance[edit | edit source]
Nitrome announced on May 20th 2011 that Fault Line had made it into the book "250 Indie Games You Must Play". The section about the game is found on page 187 of the book.
The page from the book

Trivia[edit | edit source]
- The main character, Zapo, remained unnamed until he was named in a fans post in the Nitrome Blog.[3]
- In the ending of the game, Zapo is revealed to be a test subject like Blue.
References[edit | edit source]
- ↑ Nitrome on Facebook: Check out our latest game: Fault Line..., 16 Jun 10, retrieved 16 Jun 20.
- ↑ Gamasutra Interview with Nitrome: August 2, 2010
- ↑ Nitrome's Blog Post: March 25, 2011
| v • d • eFault Line | |
|---|---|
| General | Fault Line • Fault Line (action) • Zapo • Holographic screens |
| Hazards | Mines • Lasers • Sphere shooting squares • Rotating spike platforms |
| Interactive objects | Restart pads • Teleporter pads • White nodes • Line deactivation switches • Liquid holding blocks |
- Articles in need of rewriting
- Articles with incomplete sections
- Articles with empty sections
- Award winning games
- Fault Line
- Browser games
- Puzzle games
- Games
- Platform games
- Jay is Games award games
- 2010 games
- Music by Dave Cowen
- Programming by Chris Burt-Brown
- Art by Stefan Ählin
- Candystand games
- Level-based games
- Distributable games